Quick Facts
- Priority One: Disable Energy Saving mode immediately to unlock the full brightness potential of your panel.
- Cinematic Accuracy: Switch to Theater Night or Filmmaker Mode to achieve the industry-standard 6500K color profile.
- Motion Fix: Turn off Motion Clearness or Motion Smoothing to eliminate the artificial soap opera effect in movies.
- Gaming Setup: Manually toggle HDMI Enhanced Format to enable 4K resolution at 120Hz or 144Hz with HDR.
- Visual Clarity: Reduce Sharpness to a value between 0 and 5 to prevent harsh digital outlines and visual artifacts.
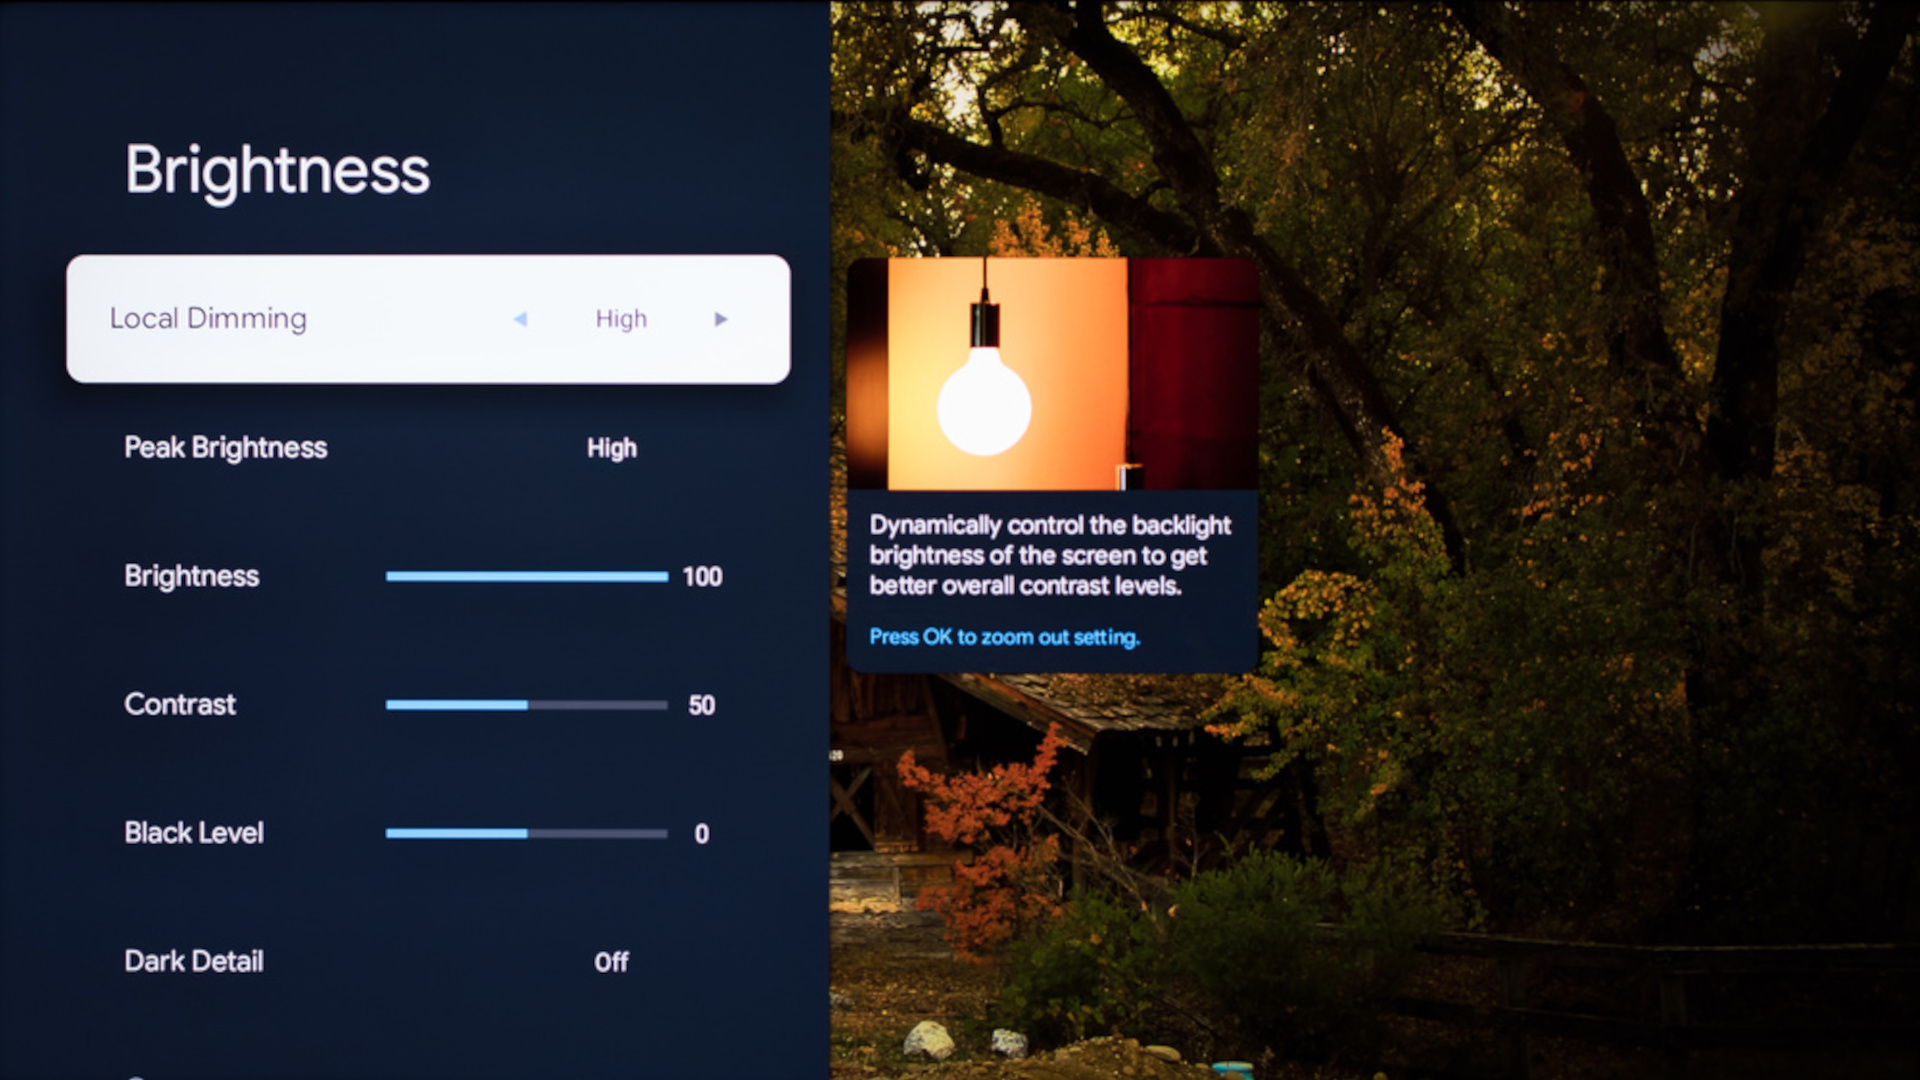
- Backlight Control: Set Local Dimming to High on MiniLED models to maximize contrast ratio and shadow detail.
To optimize Hisense picture settings, first disable Energy Saving mode and turn off Motion Clearness to remove the soap opera effect. Use Theater Night or Filmmaker Mode for accurate colors, and set the color temperature to Warm1 or Warm2. Keep the sharpness level between 0 and 5 to prevent visual artifacts and maintain a natural image.
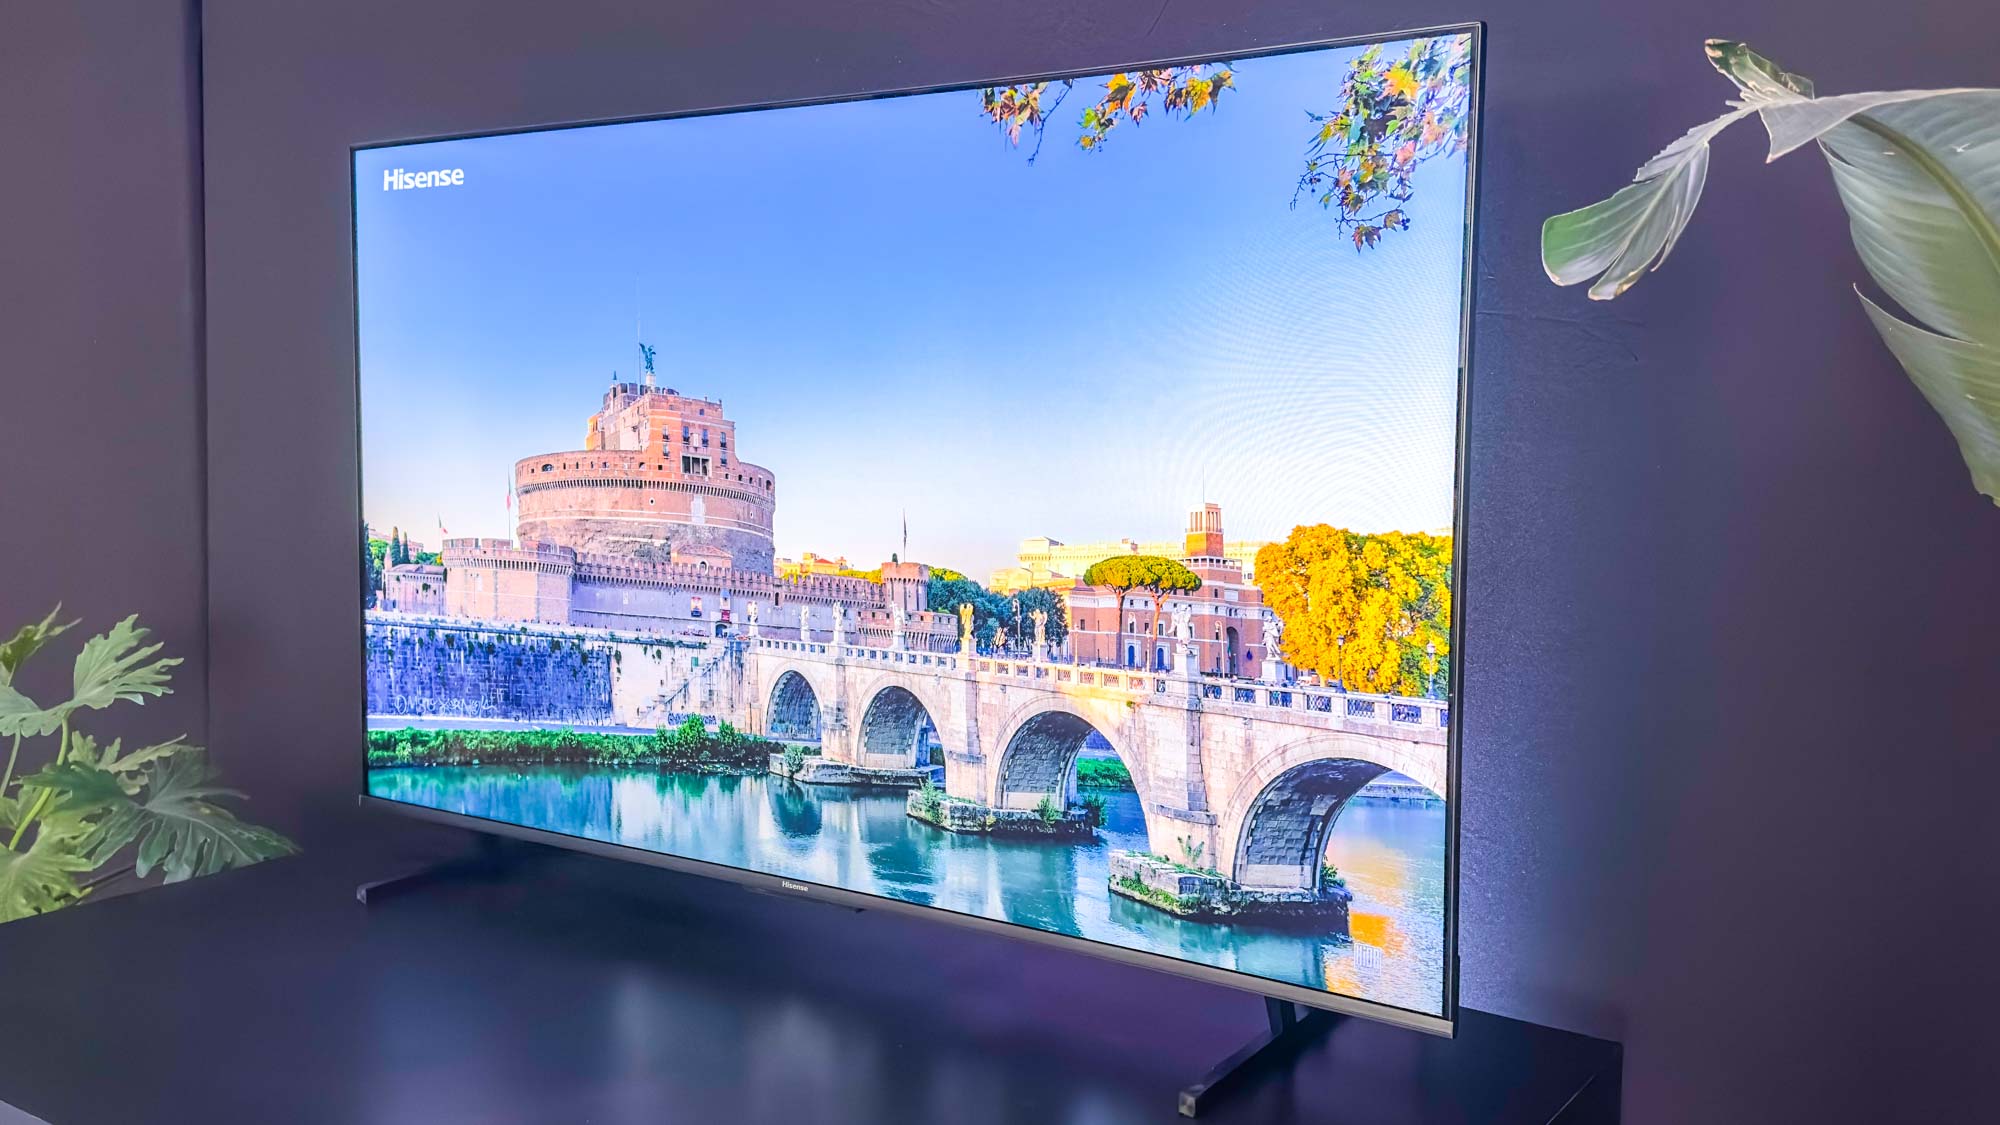
Hisense has rapidly become a dominant force in the living room, securing a 14% global market share in 2024 with 29.14 million units shipped. While the hardware is world-class, the out-of-the-box experience is often hindered by restrictive factory presets designed to meet strict energy regulations rather than provide the best visual experience. As a smart home editor, I have spent hundreds of hours testing IoT integrations and display panels, and I can tell you that five minutes of calibration can make a $500 U6 series look like a $1,500 flagship.
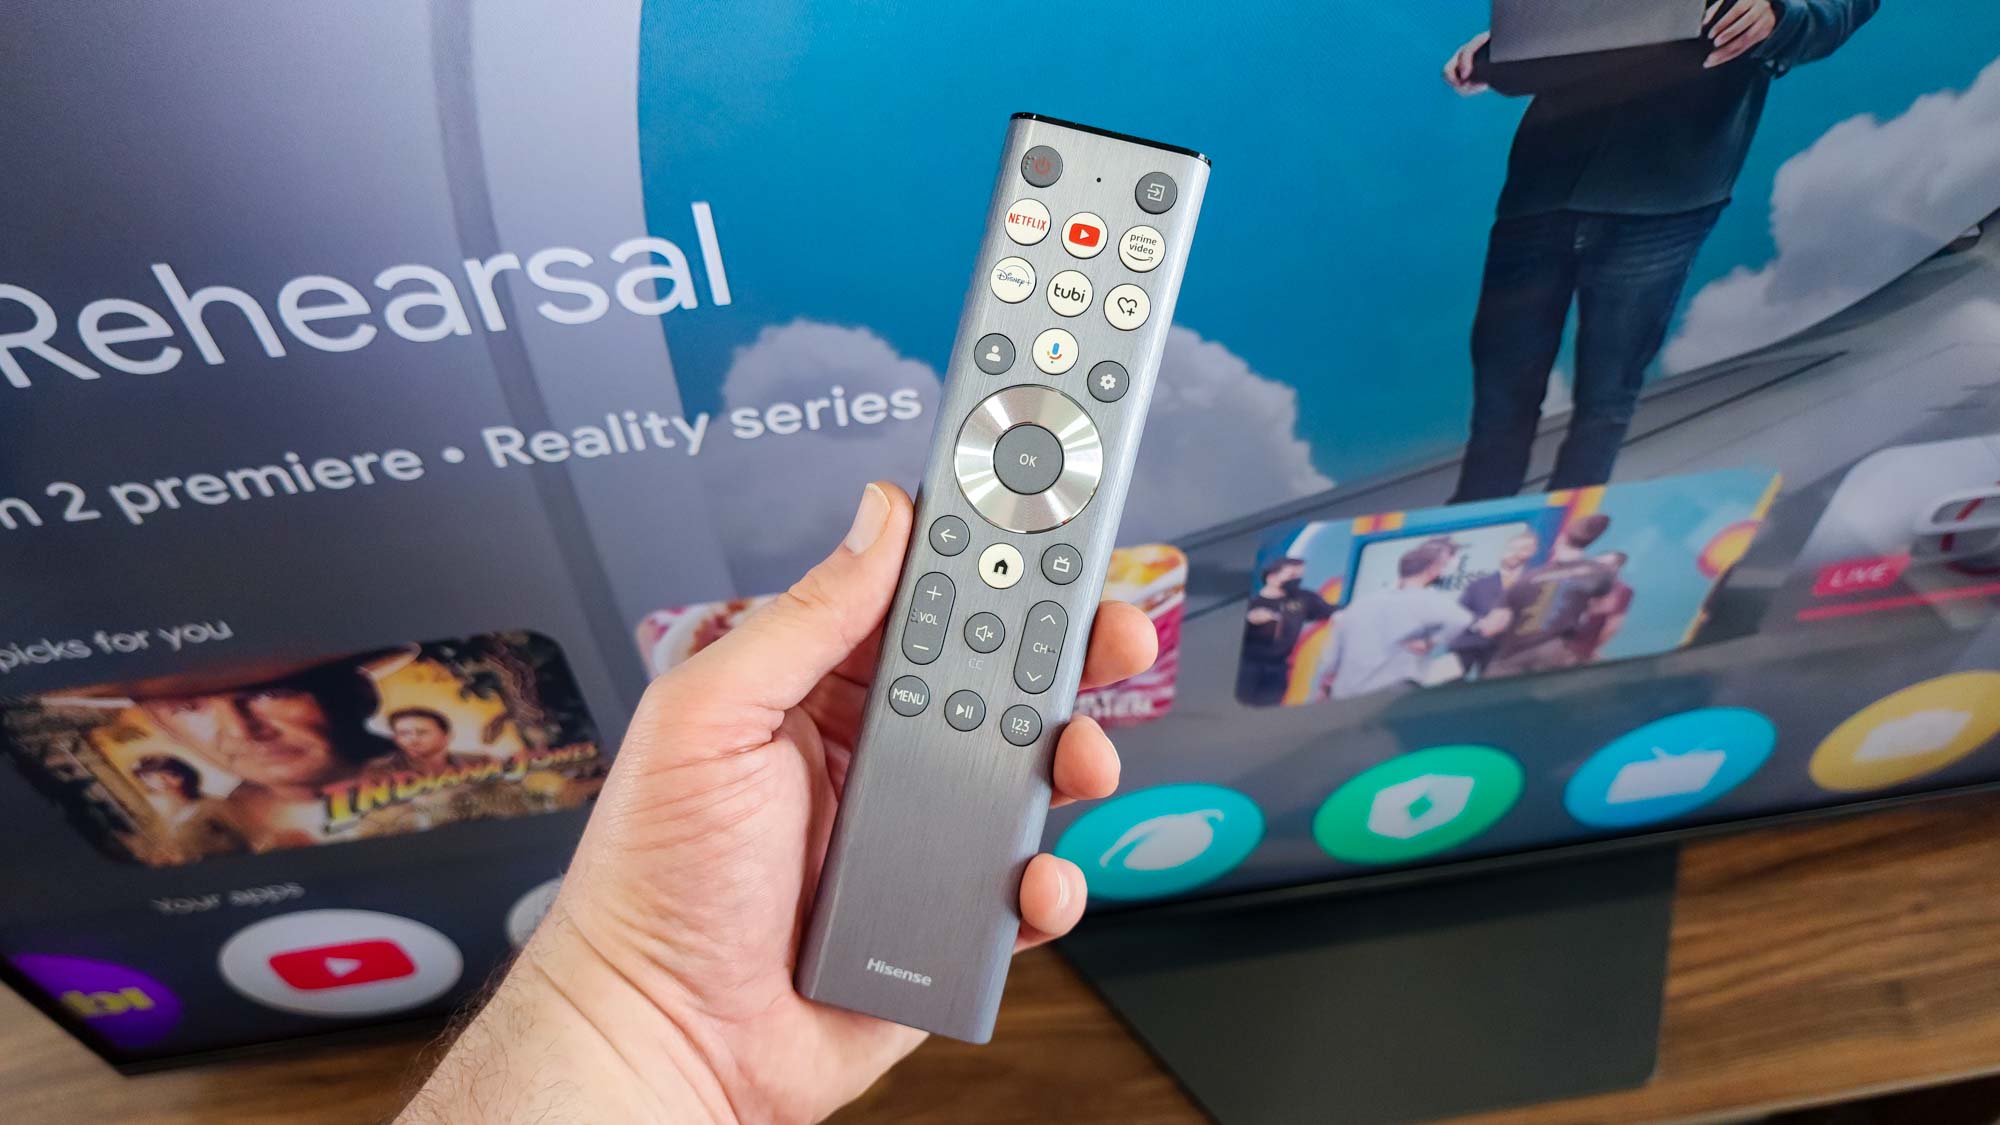
1. Disable Energy Saving and Ambient Light Sensors
The most significant bottleneck for any new Hisense TV is the power management system. Most Hisense Smart TVs arrive with Energy Saving mode enabled by default, which aggressively limits display brightness to reduce power consumption. While this is great for your electric bill, it is devastating for image quality, especially if you have a premium MiniLED display capable of high peak brightness.
When this mode is active, the TV cannot reach its rated nits, making HDR content look dull and lifeless. Furthermore, the Ambient Light Sensor often overreacts to room lighting, dimming the screen too much during the day or flickering when a lamp is turned on. To get the best Hisense picture settings for bright room viewing, you must take manual control.
Follow this path to unlock your brightness:
- Settings > System > Power & Energy > Energy Saving (Set to Off)
- Settings > Picture > Brightness > Ambient Light Sensor (Set to Off)
By disabling these, you allow the backlight intensity to stay consistent. If you are using a high-end 2025 model, these panels can reach staggering brightness levels of up to 5,000 nits, but you will only see that performance once these limiters are removed.
Pro-Tip: If you find the screen too bright after disabling these settings, do not turn Energy Saving back on. Instead, manually lower the Backlight or Luminance setting in the Picture menu. This gives you a bright, punchy image without the fluctuating dimming caused by sensors.
2. Eliminate the Soap Opera Effect (Motion Smoothing)
Nothing ruins a cinematic masterpiece faster than the soap opera effect. This is caused by Motion Smoothing, a process where the TV processor inserts artificial frames between the original frames of a movie to make movement look fluid. While this might look okay for a nature documentary, it makes a 24fps Hollywood film look like it was shot on a cheap home camcorder.
On Hisense TVs, this feature is usually found under the name Motion Clearness or Motion Enhancement. While some users prefer a bit of smoothing for fast-paced content, the default settings are usually far too aggressive, leading to visual artifacts where objects seem to shimmer or break apart during fast movement.
To fix this, navigate to:
- Settings > Picture > Picture Mode Settings > Clarity > Motion Enhancement
For movies and standard TV shows, I recommend setting this to Off or Film. If you are trying to calibrate Hisense TV for sports, you can use a Custom setting with Judder Reduction set to 2 or 3. This maintains clarity during a fast football pass without introducing the dreaded artificial look to the players.
3. Choose Accurate Picture Modes: Theater Night & Filmmaker
When you first turn on your TV, it will likely be set to Vivid or Standard mode. These modes are designed to "pop" on a bright retail showroom floor by cranking up blue tones and oversaturating colors. However, these are the least accurate Hisense TV picture modes for home use. They crush shadow detail and make skin tones look orange or neon.
To achieve true color accuracy, you should switch to Theater Night (for dark rooms) or Theater Day (for bright rooms). Better yet, if your model supports it, use Filmmaker Mode. This preset was developed by directors and cinematographers to ensure the TV displays the content exactly as it was mastered in the studio, maintaining the correct gamma and white balance.
Key adjustments within these modes:
- Color Temperature: Ensure this is set to Warm1 or Warm2. While it may look slightly "yellow" at first, this is the correct D65 white point used by professionals.
- Gamma: For most SDR content, a Gamma of 2.2 is ideal. If you are in a pitch-black dedicated home theater, you can move to 2.4 for deeper blacks.
- Dynamic Tone Mapping: For HDR content, keep this on to help the TV balance bright highlights and dark shadows dynamically.
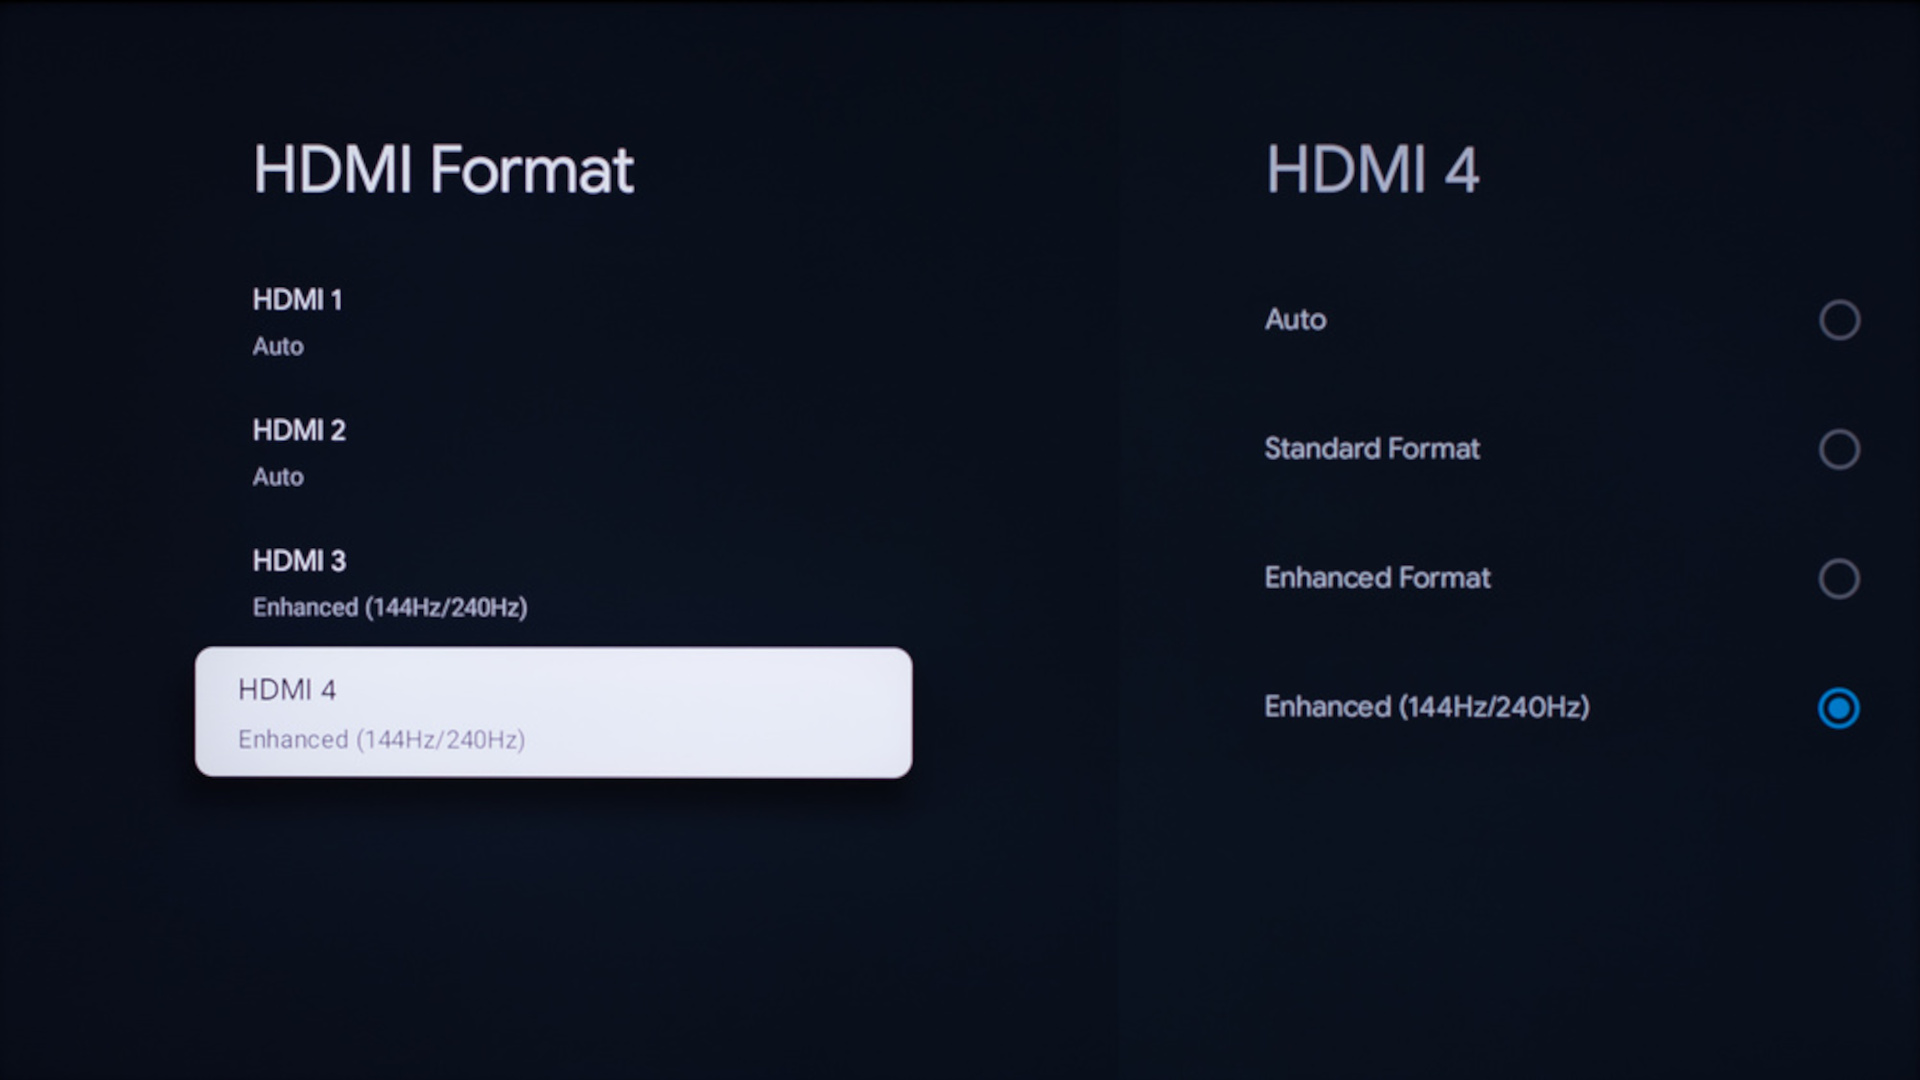
4. Optimize for Gaming and 4K HDR (HDMI Enhanced Format)
One of the most common complaints I hear from new Hisense owners is that their PS5 or Xbox Series X isn't displaying in 4K or HDR. This is almost always because the TV requires you to manually switch the HDMI input format from Standard to Enhanced in the settings menu. Standard mode limits the bandwidth of the HDMI port, preventing high-frame-rate gaming and advanced HDR signals from passing through.
To enable the full potential of your console:
- Settings > Channels & Inputs > HDMI Control > HDMI Format > Enhanced Format
Once Enhanced Format is active, you should also enable Game Mode. This bypasses much of the TV's internal processing to minimize input lag, which is critical for competitive gaming. Modern Hisense MiniLED models, like the U8 series, feature impressive 144Hz and even 165Hz refresh rates. Without Enhanced Format and Game Mode, you are essentially driving a Ferrari in a school zone.
For the best Hisense picture settings for gaming, keep Local Dimming set to High even in Game Mode. This ensures that you don't lose the incredible contrast ratio and deep blacks that Hisense panels are known for while you are playing.
5. Fine-Tuning: Sharpness and Color Temperature
The final step in your Hisense TV picture calibration for 4K movies is the "less is more" approach to sharpness. Many users believe that higher sharpness means a clearer picture, but the opposite is often true. High sharpness settings create artificial edges around objects, which results in halos and distracting digital noise.
I recommend setting Sharpness to 0 or no higher than 5. This allows the native 4K resolution of the panel to speak for itself without the interference of sharpening algorithms.
Additionally, pay attention to your specific panel type. For instance, the 75-inch models of some Hisense series use ADS Pro panels rather than VA panels. These offer better viewing angles but slightly lower native contrast. If you have an ADS Pro panel, setting your Local Dimming to High and slightly increasing the Contrast setting to around 75 can help maintain those deep black levels.
Final fine-tuning checklist:
- Sharpness: 0–5
- Color Temperature: Warm2
- Color Saturation: 50 (Default is usually perfect once you are in Theater Night mode)
- Local Dimming: High (Critical for MiniLED models)
Pro-Tip: If you are using your TV in a smart home ecosystem like Home Assistant or Alexa, you can often automate these picture modes. For example, you can create a "Movie Night" routine that dims your smart lights and automatically switches the Hisense TV to Filmmaker Mode.
FAQ
What are the best picture settings for a Hisense TV?
The best overall settings involve using Theater Night or Filmmaker Mode with the Color Temperature set to Warm2. You should also disable Energy Saving mode and the Ambient Light Sensor to ensure the TV maintains its peak brightness. For motion, keep Motion Clearness off to preserve the original cinematic feel of movies.
How do I make my Hisense TV picture clearer?
To improve clarity, ensure you are using the HDMI Enhanced Format for external 4K devices. Avoid cranking up the Sharpness setting, as this adds digital noise; instead, keep it between 0 and 5. For MiniLED models, setting Local Dimming to High will significantly improve the clarity of shadows and highlights by increasing the contrast ratio.
What is the best picture mode for gaming on Hisense?
Game Mode is the best choice for gaming because it drastically reduces input lag. To get the most out of it, ensure HDMI Enhanced Format is enabled in the Inputs menu. You can also use a Vivid-based Game Mode if you prefer highly saturated colors, but ensure that Local Dimming remains on High to maintain deep blacks during dark gameplay sequences.
Should I turn off motion smoothing on Hisense TVs?
Yes, for most content, especially movies and scripted TV shows, you should turn off motion smoothing (often called Motion Clearness or Motion Enhancement). This prevents the soap opera effect and ensures that you see the content at its intended frame rate without artificial interpolation.
What is Filmmaker Mode on Hisense TVs and should I use it?
Filmmaker Mode is a specialized preset designed to display movies as the creators intended. It automatically disables most post-processing features like motion smoothing and artificial sharpening while setting the color temperature to a professional standard. You should use it if you want the most accurate and "directors-approved" image quality for 4K movies and HDR content.