Quick Facts
- Protocol: Z-Wave Plus using the latest Z-Wave 800 series chipset for superior range and security.
- Driver Type: SmartThings Edge Drivers (Lua-based) are required for local processing and advanced parameter access.
- Certification Status: As of December 2024, Shelly Group has secured SmartThings certification for a total of ten products in its Shelly Wave Z-Wave device lineup.
- Hardware Requirements: A compatible Samsung SmartThings Hub (v2, v3, or Aeotec Smart Home Hub) is mandatory.
- Setup Method: A software-first approach is recommended, installing drivers before physically pairing the hardware.
- Key Benefit: Local execution ensures your automations run even if your internet connection goes down.
Integrating your Shelly Wave Z-Wave devices with Samsung SmartThings has never been easier thanks to the new Edge Driver architecture. This guide provides the official steps for hub enrollment and device pairing to ensure your smart home operates with maximum reliability.
To install Shelly Wave Edge drivers, access the official Shelly invitation link and sign into your Samsung account. Select your SmartThings Hub, click Enroll, and wait a minute for the hub to register. Then, navigate to Available Drivers under your hub settings and select Install for the specific Shelly Wave drivers you require to enable local processing.
Step 0: Installing Shelly Wave Edge Drivers
Before you even take your Shelly modules out of the box, you need to prepare your SmartThings Hub. In the past, Z-Wave devices often relied on cloud-based Device Type Handlers (DTH). However, the modern SmartThings ecosystem uses Edge Drivers, which allow Shelly Wave SmartThings integrations to run locally on your hub. This results in near-instant response times and better reliability.
The first step is to access the official Shelly Wave smartthings edge driver invitation link. This link connects your hub to the specific channel where Shelly hosts its verified drivers.
- Open a web browser and navigate to the official driver invitation:
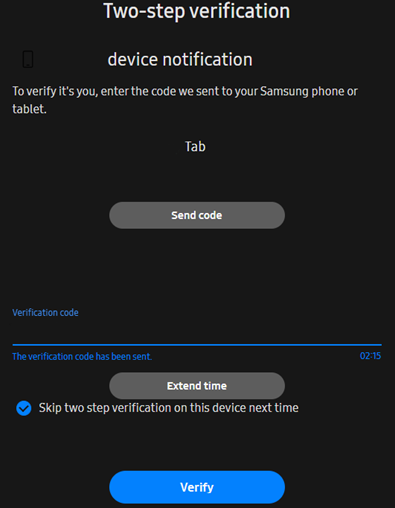
https://bestow-regional.api.smartthings.com/invite/adMKvAPaArj9. - You will be prompted to log into your Samsung account. Ensure this is the same account associated with your SmartThings Hub.

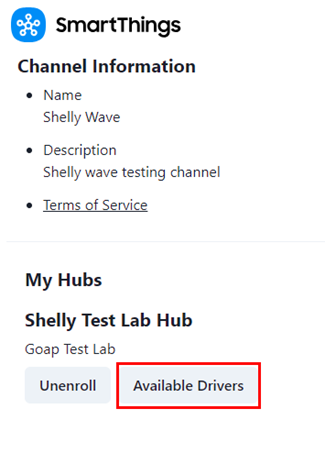
Once logged in, you will see a list of your compatible hubs. Choose the hub you wish to use for your Z-Wave network and click the Enroll button. This action authorizes your hub to download drivers from the Shelly channel.
After enrolling, click on the Available Drivers button. You will see a list of specific drivers for various hardware modules. It is important to install the specific drivers you need. For example, if you are setting up a Shelly Wave 1 or a Shelly Wave PM, select those specific options. If you are working on a shelly wave shutter smartthings edge driver setup, make sure to install the shutter-specific driver to ensure the interface shows open/close controls rather than a simple on/off switch.
Wait at least one minute after clicking install. Your hub needs this time to download the code and register it within its local memory. This proactive how to install shelly wave edge drivers on smartthings hub approach prevents the system from defaulting to a generic "Z-Wave Switch" profile that might lack power metering or advanced settings.
Adding Shelly Wave Devices to the SmartThings App
With the drivers safely installed on your hub, you can move on to the physical Shelly Wave Z-Wave device pairing process. Shelly Wave devices utilize the Z-Wave 800 series (S800) chip generation to provide secure communication and interoperability within the SmartThings ecosystem. This hardware generation supports S2 security, which encrypts the communication between the device and the hub.
To begin pairing, open your SmartThings app on your mobile device. Tap the plus (+) icon in the top right corner and select Add Device. From here, you have two primary options:
Scanning the QR Code Most modern Shelly Wave devices, like the shelly qubino wave 1 smartthings pairing guide suggests, feature a QR code on the housing or the instruction manual. Scanning this code automatically handles the S2 security authentication by providing the DSK (Device Specific Key).
Manual Inclusion If the QR code is inaccessible or fails to scan, you should select the option for adding shelly wave devices to smartthings without qr code. To do this:
- Choose Partner devices.
- Search for Shelly or scroll to Z-Wave.
- Select Generic Z-Wave Device.
- When the app starts searching, put your Shelly device into inclusion mode.
For most Shelly Wave modules, inclusion mode is activated by toggling the connected switch three times rapidly or pressing the small "S" button on the device three times within two seconds. If the device is brand new and has never been paired, it may automatically enter inclusion mode the moment it receives power.
During the pairing process, the app may ask for a 5-digit pin. This is part of the S2 security layer. You can find this pin on the device label, usually highlighted or underlined within the DSK string. Once the hub identifies the device, it will automatically match it with the Edge Driver you installed in Step 0.
Advanced Parameters & Local Automation
One of the biggest advantages of the Samsung SmartThings Z-Wave configuration for Shelly devices is the ability to customize how the hardware behaves. Because you are using specific Shelly Wave Edge drivers rather than generic Z-Wave handlers, you gain access to a menu of advanced configuration parameters directly within the app.
For instance, the Shelly Wave Plug US supports home automation and power metering for electrical appliances with a maximum power capacity of 1800 W at 15 A. By navigating to the device settings in the SmartThings app, you can adjust:
- Power-on State: Define if the device should turn on, turn off, or remember its last state after a power outage.
- Reporting Thresholds: Set how often the device sends power consumption data back to the hub. Reducing frequency can clear up Z-Wave network traffic, while increasing it gives you more granular energy charts.
- Input Modes: For in-wall modules like the Wave 1PM, you can configure whether the physical switch connected to it is a toggle switch or a momentary button.
Using these drivers allows users to adjust settings like power-on state, reporting thresholds, and device-specific behaviors directly within the SmartThings app while ensuring compatibility with the latest Z-Wave Plus standards. Furthermore, because these drivers run locally, you can create complex automation routines—such as turning off the Wave Plug if energy consumption exceeds a certain wattage—that trigger even if your internet service provider has an outage.
Troubleshooting: Reset and Generic Exclusion
Sometimes, the pairing process doesn't go as planned. This is often because the device still has "stale" pairing data from a factory test or a previous setup attempt. If you find yourself needing to troubleshoot shelly wave z-wave inclusion smartthings, the first tool you should use is Generic Exclusion.
Z-Wave devices can only be paired to one hub at a time. To clear any old data:
- In the SmartThings app, go to your Hub's settings.
- Tap on Z-Wave Utilities and select Z-Wave Exclusion.
- While the hub is in exclusion mode (indicated by a flashing LED or an on-screen prompt), perform the 3-tap sequence on the Shelly device.
- The app should confirm that a device was deleted or excluded.
Once the exclusion is successful, you can try to add the device again. If the device is still unresponsive, you may need to perform a full factory reset. To remove and exclude shelly wave device from smartthings hub effectively, you usually hold the "S" button for 10 seconds or follow the specific 5-tap reset sequence outlined in the manual for your specific module.
Always ensure your SmartThings Hub is physically within a reasonable range of the Shelly device during inclusion. While Z-Wave is a mesh network, the initial pairing (especially with S2 security) is most stable when the device and hub are in the same room. Once paired, you can move them to their final location, and the Z-Wave mesh will automatically heal to find the best communication path.
FAQ
How do I connect Shelly Wave devices to SmartThings?
To connect Shelly Wave devices, you must first install the official Shelly Edge Drivers via the provided invitation link. Once the drivers are on your hub, use the SmartThings app to Add Device, put the Shelly hardware into inclusion mode by tapping the S-button or connected switch three times, and follow the on-screen prompts for Z-Wave pairing.
Does Shelly Wave require a Z-Wave hub?
Yes, Shelly Wave devices communicate using the Z-Wave Plus protocol and require a compatible Z-Wave hub, such as the Samsung SmartThings Hub or Aeotec Smart Home Hub, to function and connect to your home network. They do not connect directly to Wi-Fi like the standard Shelly Pro or Plus lines.
Are Shelly Wave modules compatible with the SmartThings app?
Yes, Shelly Wave modules are fully compatible with the SmartThings app. Recent certifications have expanded the lineup to ten officially supported products, ensuring that they show up with the correct icons and controls within the Samsung ecosystem.
Do I need a custom Edge driver for Shelly Wave on SmartThings?
While SmartThings might detect Shelly Wave devices using generic drivers, it is highly recommended to use the official Shelly Edge Drivers. These custom drivers enable specific features like power metering, local execution, and access to advanced configuration parameters that generic drivers often miss.
How do I reset a Shelly Wave device for pairing?
To reset a Shelly Wave device, you can typically press and hold the "S" button on the device for 10 seconds. Alternatively, if the device is connected to a switch, you may be able to reset it by toggling the switch 5 times within 1 minute of applying power. Always check the specific manual for your model to confirm the exact reset sequence.